


Updating the Montréal
When Bassi designed the very first version of Le Montréal in 2013, it was already a departure from what we were comfortable with — it wasn’t a classic straight track frame, and it wasn’t an Italian racing bike. It was shaped like a road bike, had thin tubing and a nimble geometry, but had room for 700 x 35mm tires (and you could just about squeeze in a fender if you were creative) and rack eyelets front and rear. It was common to call that a cyclocross bike in those days, but we didn’t know that many cyclocross racers. What it was actually meant to be like was the old bikes we repaired, rebuilt, modified and upgraded every week at our shop on Villeneuve St. Every Montréal V1 from 2013 took 700C wheels. It would have been unthinkable then to produce a run of frames with smaller wheels for the smaller sizes, and in any case good luck finding 650B rims and tires locally. The tight road bike geometry meant that on the smaller sizes around 50cm, the front wheel was really close to your feet, causing toe overlap – turning the wheel sharply while your foot was in the forward position had them occupying the same space, followed by you occupying the ground if you were clipped in. Because you don't turn the handlebars much except in a very slow-speed (or stopped) turn it's not what you'd call dangerous. Nonetheless, the Montréal changed the kinds of bicycles we felt Bassi could make, and its classic lines still perfectly fit what Montréalers expect from their everyday ride: understated beauty and a style that matches the city. Plus you could really load it with groceries and put your kid’s seat on the back, and those super-wide (for the time) tires were way safer around the potholes. It was a successful frame, and led to some variants: the Villeneuve and the Rachel were also well-received and were based on other things the Montréal could do with some tweaks, and we were ready to make a new run in 2017, but this time we’d try something different: the smallest size (49.5cm) would have 650C wheels. This wheel size standard (with a 5cm smaller diameter) was more familiar for road bike people, being common for Terry bikes and other racing bikes for shorter athletes. This eliminated toe overlap, but the 52cm frame still had some with its 700C wheels, especially with fenders. That was my bicycle: Le Montréal V2 52.5cm. I didn’t mind the toe overlap and it became second nature to work around it when riding. I’d chosen a smaller frame than I usually would, since it had very long reach: a necessary design compromise to use large 700C wheels on a small-ish frame with road bike geometry. This worked well with some setups and less with others, and eventually I began thinking of sizing up so that the handlebars would be closer and higher, and the seatpost not as embarrassingly extended. The Montréal V3 was a significant redesign. By 2020, we were ready to go all-in on the different wheel sizes, and felt confident we could supply it with wheels and tires. Doing so would also allow us to expand the size range to fit more riders comfortably. This redesign went to six frame sizes, with three wheel sizes, and our overlap problem was gone completely. This year, I felt it was time and I was ready to switch to a 55cm frame (I’m 5’11” with a PBH of 86cm for comparison’s sake). I’d need to build myself some 650B wheels, since I’d never owned any, only 700C which is a-ok on most bikes for a taller person, and 20-inch on my minivelos. I wound up trading my old frame and wheels to my friend for some art and their own old wheels they weren’t using any more, so the hubs and half the spokes on this bike had already toured the world! The rims are new Zac-19s, the original 650B rim from when Rivendell reintroduced the wheel size in the oughts. We had some on-hand with the right drilling. I of course needed to replace the fenders, since these tires are wider and the diameter is smaller. My old Honjos with their beautiful scratched-up greying non-anodized aluminium went with my old wheels, and I’m burdened by shiny new fenders (for a few years until they also develop their patina and beausage). You’ll see in the photos that the rear is installed very badly, but you can only see it from that angle, which I never do. Honjo fenders take several hours to install perfectly, but happily if you’re accepting of a merely very good installation, you can knock em out in 1h30. Everything else is the parts from my old bike. They all, of course, fit on the first try without needing adjustment. I didn’t even redo any housing! For more info check out the original blog post about this bike. Incidentally, this has turned out to be a great airplane bike. We’ll be exploring and explaining that concept more this year, but when flying somewhere to ride there, it helps to have a sturdy and simple bike that’s really straightforward to disassemble as small as possible. Downtube shifters are huge for that, non-æro brake levers help a lot as do cantilever brakes, and my silly idea of having a quick-swappable cockpit has been very helpful. The racks also all come apart very quickly. The only bit that takes any time is removing the fenders and once the wheels are off, it’s not that hard. They get tied to the wheels for packing, of course. Long Allen keys like those from Wera really help, it’s a little trickier with a multitool. The correct size frame is a lot more comfortable to ride, especially on long distances, and the lack of toe overlap was an astonishing relief! I’d become used to working around the wheel position on the other frame, but now I never have to even consider it, even with wide 42mm tires and big fenders. This do-everything bike is the one I walk out the door with when I don’t have a pressing reason to take another: the racks go on and off quickly so I can use it for cat food and litter errands, it’s got a dynamo so I don’t have to worry about sunset, and the sorta-wide 42mm tires are just as nice on fresh clean asphalt as they are on rocks and dirt. I’ve taken it on last-minute bike tours since it’s so simple to pack for flying, and it’s the last bike to be put away for winter, as well as the first to come back out in the Spring. I also love how it looks, though that’s true of all my bikes! Way more pictures below for you to see — don't forget to open them in a new tab to embiggen! Photos, as ever when they're this good, by Troy.
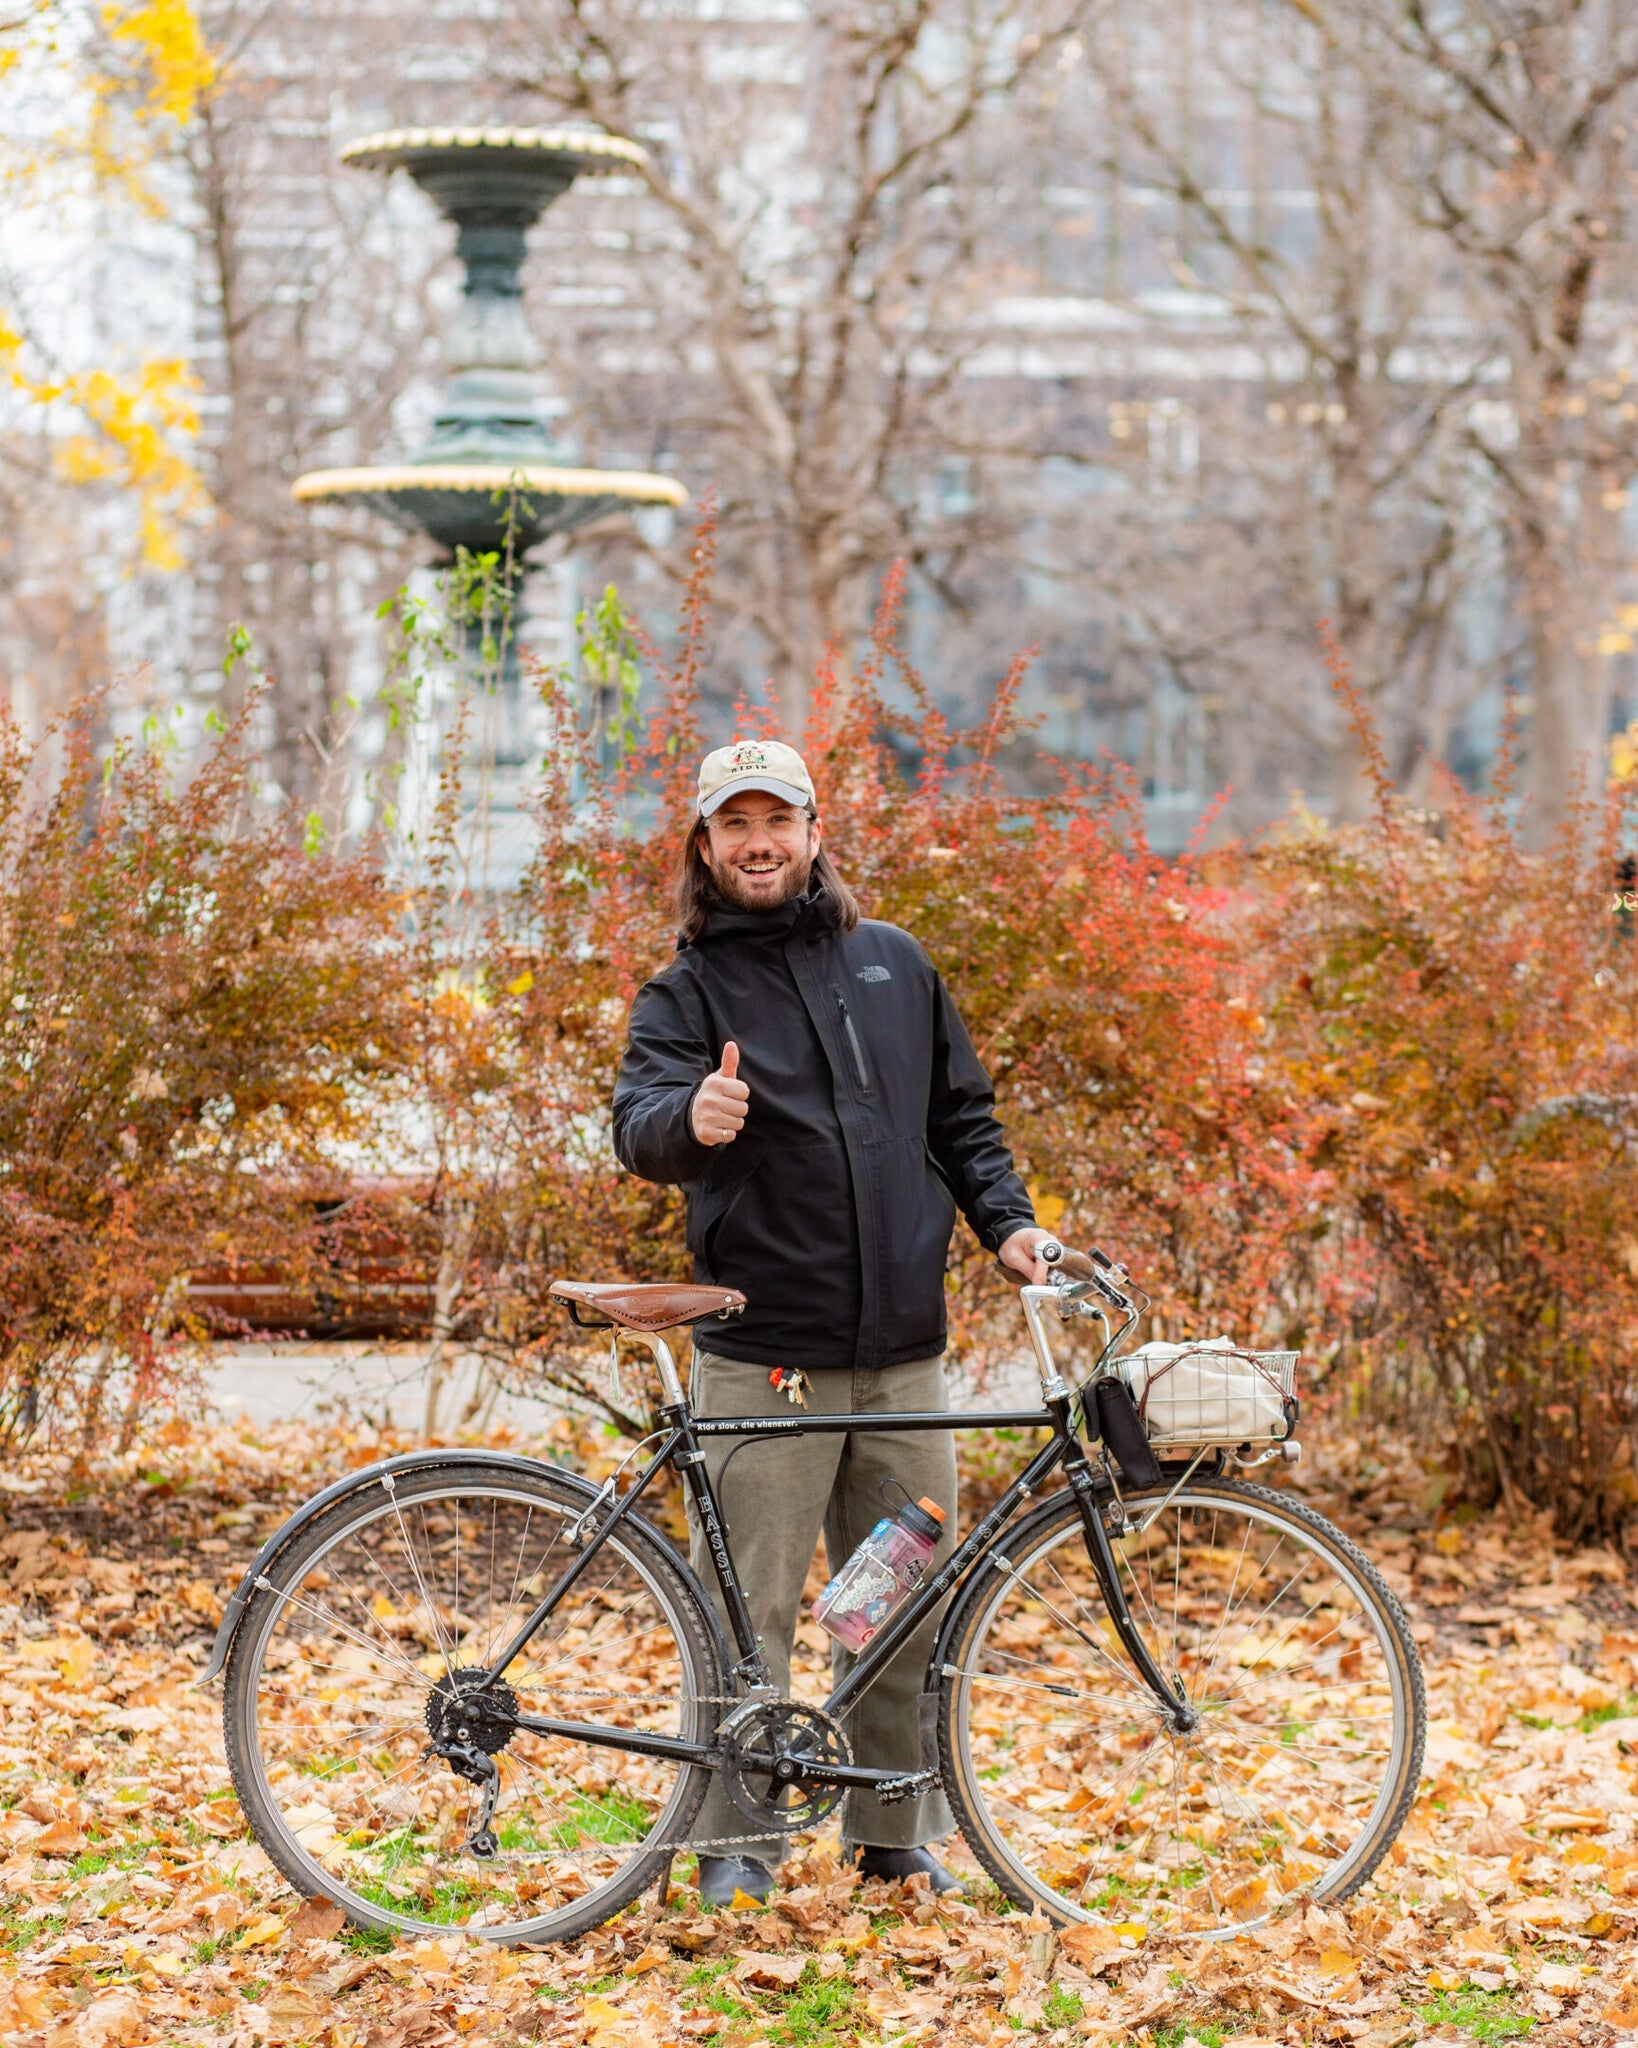
Sam and his Bassi Le Montreal (V2)
After years riding a fixed gear bike I felt like slowing the pace a bit. My 30th birthday was waving at me from afar and I was feeling more and more like cruising down the Berri hill. My knees still thank me. So a city bike was looking like a great alternative and at the time, even before being part of C&L staff, there was a sale for that version of the Bassi Montreal. The stars were aligned. Back then, my bike knowledge could be measured in “ratio-to-skid patch” and with how many Thickslicks I could go through in a year. I had not yet met the Nitto, Blue Lug, Rivendell, Sim Works and René Herse of this world. It wouldn’t be long. The stock build being slick and solid was totally gonna suit my needs. Anyways, I was so eager to ride like a grandpa. Which I still do and showing it off with that Stridsland decal. I eventually swapped almost all the stock parts. Only the crank, the front derailleur, and the wheels remain from the original spec (for now). As you can see, I have rapidly been influenced by the companies mentioned above and their instagram accounts. To my defence I also explored different setups to maximize my comfort and my pleasure. Because, let’s be honest, without comfort and fun I might as well ride a Bixi. So this version of my Montreal is the most optimal version to this day to fill this quest. My favourite add-ons are probably the Sai Flower Blue Lug’s triangle reflector and the Nitto lamp holder no.7. Good gift ideas in my opinion. They have no impact on my comfort but they sure do look good on any bike! With winter still going strong, I'll sadly have to leave this bike hanging in my home office for a little while. Cute wall art I think. We might see it again when the snow and salt will make way for clean roads and crowded parks once again.

Tyler's Bassi Le Montreal
Let me preface this with saying that bike fit is a huge PITA for me. I have the legs and arms of someone about 6'2" (91.5cm inseam!), the torso of someone 6 inches shorter, and the spinal flexibility of a dry noodle. With all this in mind, the super tall stack, short stem and setback seatpost were essential to getting my fit just right. My coworkers all joke that I'm basically riding a flatbar bike at this point and I suppose they wouldn't be too far off the mark, though this is currently the most aggressive/zippy bike I have. My other builds (Piolet and Hog's Back) are set up with chunky tires and the sweepiest of alt bars, so dabbling in drop bars has been a fun change. I was pretty curious about the Microshift Sword groupset and decided to give it a try. I've dubbed the build "Grandonneur" as it takes some inspiration from Rando builds but with a 10x2 gravel groupset that has a decent enough high and low end without too many big jumps on the 11-38 cassette. It's all pretty modern looking, though I did throw some sweet Dia Compe cantis on to help keep some of the classic lugged frame charm. A wide-ish Nitto Dirt Drop handlebar and 42mm Cava Robusto tires lend the bike a little more offroad capability without taking away from it's zippyness on pavement. The wheels are built up on 700c Archetype rims, a Bassi touring rear hub, and like all my bikes, a dynamo hub up front. I love never worrying about charging lights and if I decide to stay out late on a ride I know I'm good to go on the way home. For now the bike is rack-less and (almost) fenderless, a conscious decision to keep weight down even if it does mean I'm a little grubby on my return home. I have plans to sew up a couple bags to keep all the essentials I need when out for longer rides, a project for the winter season while the bike awaits the spring melt. Photos by Troy
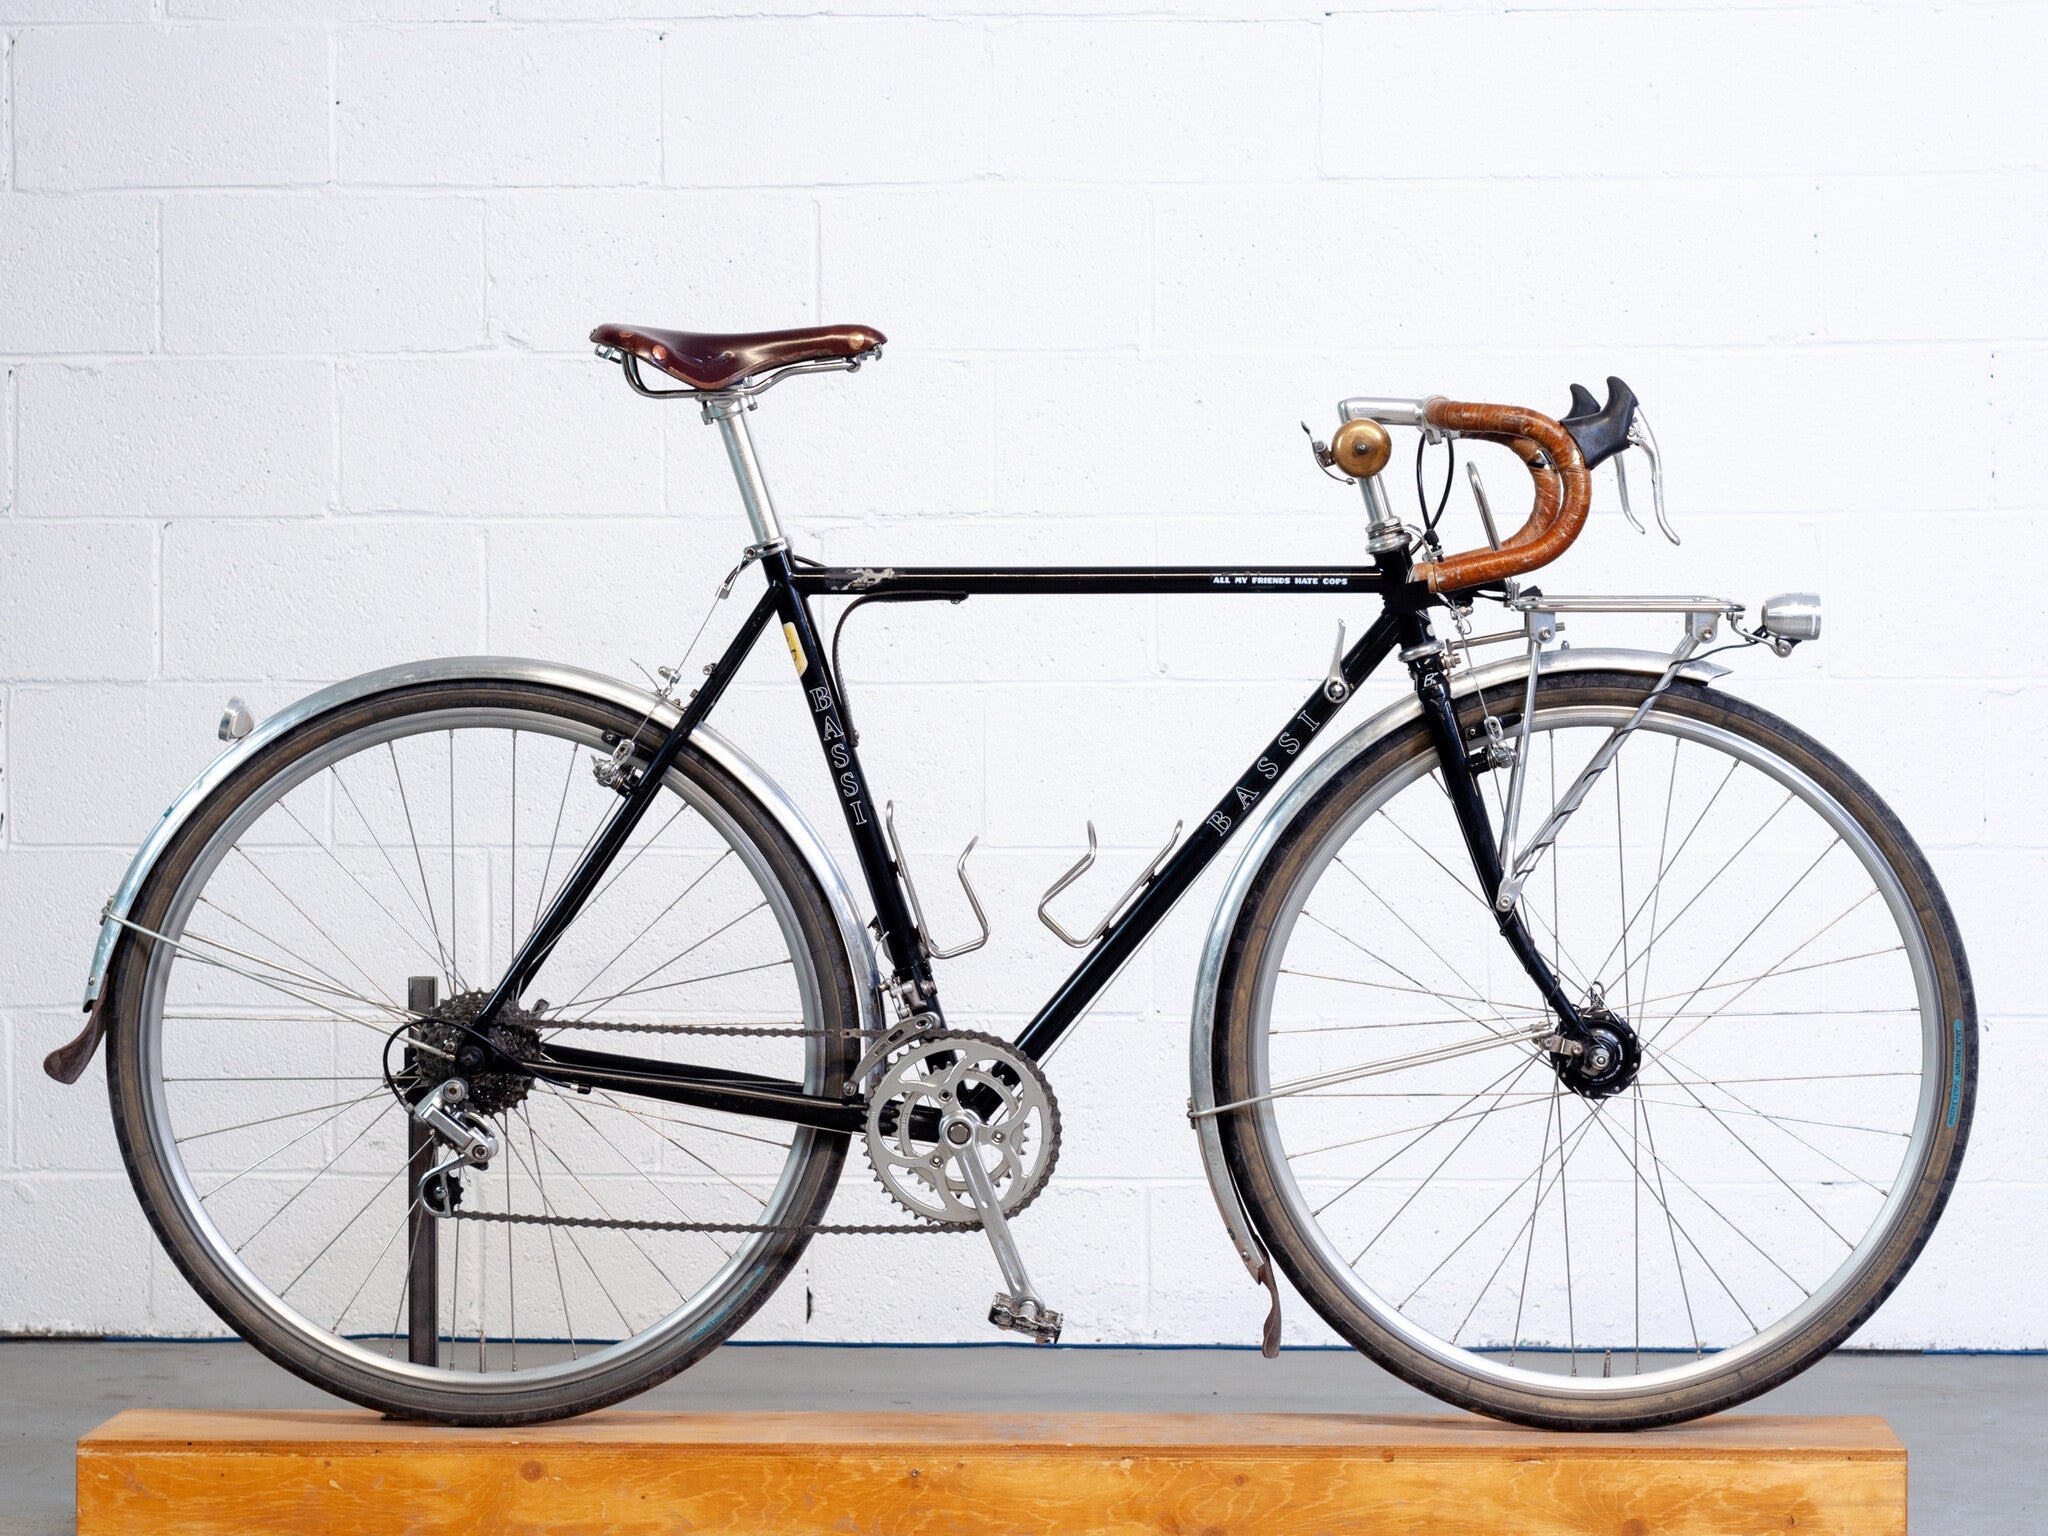
Simon's archetypical Le Montréal
Open images in a new tab to embiggen Hello beloved bicycle people, it's Simon. If you've emailed C&L we've certainly been in touch, and some will remember me from my years as the main front-of-house person at 978 Rachel. We probably also had coffee together if you've come to our group rides. These days I do a lot of things around the ol' bike company, but the relevant one to this blog post is that I spec out our Bassi builds, buy the relevant parts, and quote people on their cool custom projects. I'd like to tell you a few things about my main ride around town, since I use it all the time as an inspiration and it's got some really well-loved parts and it's helpful to see how certain things (like people) age gracefully. I've had this 52cm V2 Le Montréal since the moment it came off the boat in 2016. As you can see from the photo above, it's a little bit small for me, but that made sense with how I originally built it, and even now I kind of like that about it. What you have before you today is the third major build and the one I'll keep as-is for many more years. That's because I believe I've found the perfect, platonic Montréal: since I've built it this way, it has cast its shadow on every single bicycle I've had a hand in, and that's quite a lot of bicycles. I also sometimes catch it out of the corner of my eye and say "well, if that isn't just the exact way a bicycle should look". This is now my only road bike! It's pretty quick and manœuvrable (not like my old Italian steel of course) but has room for some tire and some cargo, so it's way more useful every day around town. The smaller Montréals of the V1 and V2 generations, including mine, had some pretty vicious toe overlap, but that's a normal thing on oh so many road bikes with small frames but big 700C wheels. You get used to it after a while. These days we make this size with 650B wheels and it's a lot better, 2016 was before we'd gone all the way on proportional wheel sizes on our frames. I can only shake my head at our timidity. Let's go through the build, why don't we? Along the way I'll point out the beausage on certain parts, so you can know what to expect from your own beautiful bicycle as it ages and bears the marks of your adventures and everyday life together. There will be stories and opinions. THE BRAKING Shimano SLR æro levers: I don't know what kind, or from when. They came out of the old-old C&L garage in 2013. They squeaked, once, then I oiled the pivot and that was that. Shimano really used to know how to make a pretty part when they wanted to, and they just work. Dia-Compe DC980 Cantilevers: we sell these now in 2024, and when I look through the 1980s Dia-Compe catalogues, there they are, completely unchanged. They're super-small, minimalist, light, and exactly strong enough for what this bike does. They're perfect and elegant - why would you change them after perfecting them forty years ago? That's right, you wouldn't. Dia-Compe sticks to their guns. Hangers: the front is the ultra-sturdy steel model from Dia-Compe. Ask me in person sometime why I modified it, it's a bit too silly to go into here. The rear is seatpost-bolt-mounted from Nitto, because when Nitto make something it's the most sensible yet most elegant way to make a part. THE DRIVETRAIN René Herse Crankset: Ah. Yes. Well. It's a really nice crank. It just doesn't do anything another crank wouldn't for half the price. Don't get one unless you really, really enjoy *~*æsthetics*~* of vintage French bikes and don't mind paying for it. I'll say that it really is enjoyable to pedal and top-notch workmanship. Just look at it though. Whew. Wellgo pedals: the nine-to-five slob to the crank's socialite beauty queen. I don't know which model this is, I used to get whatever flat/clippy Wellgos Marinoni was clearing out at the time when I needed another set. They've been on massive tours with me and don't mind getting smashed on rocks and sidewalks. Wellgos work really well! Never turn your nose up at a Wellgo. Campagnolo front derailer: another part from the old C&L parts garage. I had a modern double for a while but you know how the cages are shaped and squished around? That makes the chain shift more smoothly from one chainring to the next, but also rubs a bit if your alignment isn't perfect. So I grabbed this completely flat and straight '80s derailer from my bin, and guess what? It shifts perfectly every time. It just goes "KER-KLUNK" while doing it, nobody ever accused vintage Campy of shifting smoothly. Shimano parts-bin rear derailer: I forget whose parts bin it's from actually. It's about as old as I am, was always generic non-series (like yours truly), hates going into a 32-tooth cog, but like the brake levers is from when Shimano could really make a good-looking bike part. I'm calling it now: this part will outlive me. Rivendell Silver Shifters (aka Dia-Compe W-Shift): I think I've written more about this shifter than any other bike part or concept. They make the whole package work together and are a pure pleasure to move and feel. Plus, when mounted to the downtube, they're the lightest shifter you'll ever encounter, and all you need is about eight inches of housing. I grew up with downtube shifters on Dad's old Motobécane and never minded them, but even for someone new to them, it becomes second nature quickly enough. 8-speed cassette: I don't know, Shimano or something, who cares. THE WHEELS The hubs are the old (sadly departed) Formula-made Bassi Road hubs that I've had on a few bikes. Originally this bike had Hplusson Archetype rims and I rode enough that they were due for a replacement, which is a life well-lived for a pair of rims. Now I'm riding my fave cheap-ish road rim, the Alex R450. No nonsense, just good solid dull-silver aluminium and stickers that are easy to remove. That dynamo hub on the front is a Shimano Alfine. It was my first dynamo and, I'll say it again, Shimano made it, so it's still going. Rivendell Jack Brown tires: from back in the day when Riv was working with Panaracer on a tire program. Tire selection was nowhere near as good then as it is now, it's another domain where the bike industry owes them recognition for sticking their neck out and improving things for everyone. They're smooth-but-grippy, have good volume at 700x33mm (plenty for any road-plus bike) and might be my longest-lasting tires ever. Innertubes: yes THE COCKPIT Nitto Technomic NTC-DX stem: It's the most perfect stem anyone has ever made. I don't think I need to explain more (but send me an email if you'd like me to and you want a few pages of ranting and raving). Actually, just take 25 minutes out of your week and enjoy my favourite video on Youtube: Blue Lug visiting the Nitto factory Nitto Noodle M.177 42cm handlebar: I like other more traditional rando bars, but the Noodle lives in my heart. It's comfortable and beautiful, another successful Rivendell collab. I'm not a bodybuilder so on a road bike the 42cm width is very comfortable. Newbaum's cotton bar tape, shellacked: This is what you get if you use light gray cotton bar tape and garnet-grade shellac. The cotton tape gives just enough texture (no cushion but I ride in gloves) and the shellac protects it from dirt, abrasion, moisture, and me. Ask a woodworker friend about shellac, we usually all have some. I was looking forward to photographing this for you all, because this tape job is about four years old and it's good to see what you can expect if you do this to your bike. When the shellac layers got too banged up, I'd clean them a little, then simply reapply new coats over the old ones. Shellac is in an alcohol solution and the new layers dissolve the old ones a bit, so you don't need to do anything special to integrate them. The later layers are almost colourless blonde shellac, and the different colours you can see are a reflection of how it's been worn away based on where I hold the bars, or where I lean the bike.The spot where the tape goes around the brake levers is bare because I simply do not care about that when it comes to my personal bikes. I'll wrap yours up good and pretty, don't worry. Crane Suzu Striker bell: The raw brass model. The sound is glorious, loud, and sustained. Everyone loves hearing it. Again, this is what you can expect from yours after many years of love. I've bent back into place all the parts of it, and even hammered the bell back into shape with a ball-peen after it got a little smashed. "Biiiiiiiinnnnnggggg.............." THE FENDERS Honjo Fluted H29 (I think): another fabulous example of beausage! This is the second bike I've had these on. They fit great, the rolled edge means the water stays inside the fenderline, they're light and don't rattle ever, and I think they're so gorgeous. Their beauty only gets better when they have the honest scrapes, bumps, dings and scratches of a life well-lived. They're also soft enough that you can bend or hammer them back into whatever shape you think they should be. Honjos need some very careful work to install perfectly and that takes a few hours and can lead to frustration, so here's my trick for speeding things up: don't install them prefectly, just install them pretty well. Dia-Compe leather fender flaps: they're so wee and cute! Velo Orange fender-mount reflector: don't pretend you didn't see me buddy, I've got a catadioptre. THE LUGGAGE Velo Orange Flat-Pack Rack: it goes from décaleur to tombstone and you can go 2-stay or 4-stay. Mounting your front rack to the mid-fork eyelets if you have those is the way to go, very sturdy. Plus, if I don't want the rack on my bike that day, I undo three bolts and it comes right off, leaving the fork-crown doohickey right where it is on the bike. These days I put a randonneur bag on this rack. Check out how the angles match the ones of the bike! Carradice Classic Saddle Bag Rack: when the company that made this for decades went out of business, Carradice bought this fine rack and kept having it made. It hangs off the saddle loops and rests on the rails, which is super clever, and it just lifts right off so you can pop into the shop with your bag. Not for massive loads, but wonderful for a small saddlebag around town. Carradice Barley saddlebag: I ordered this little bag direct from Lancs, UK back when the exchange rate started being reasonable for the first time in my life. It was my first Carradice and I've been a big booster of theirs ever since. This small cotton duck model is just right for day trips and using around town. The dowel (the straps for attaching it to your saddle loops go around an internal wooden dowel) broke a couple years ago so I went out and bought some dowel from the neighbourhood hardware place. Easy enough as far as repairs go. THE LIGHTING B+M IQ-XS: dynamo hubs and lights all pretty much go together these days. The current light is Busch und Müller's small but bright shaped-beam IQ-XS. It's silver and has a switch. Really it was the lazy choice, I knew it and liked it already. If you ask me to spec you a dynamo setup I'll probably suggest this light. MISC Tange Levin headset: old-school good looks, precision Japanese manufacturing. Love it. IRD Tenacity QB-40 bottom bracket: adjustable cup-and-cone bottom bracket with excellent metals and precision Japanese manufacturing, again. Also love it. I want to spin it forever. Once you know how to adjust one of these it's super easy and quick. Unbelievably cool that this exists in TYOOL 2024. Brooks Swift saddle: it's the prettiest of Brooks' premium saddles (hand-skived edges? yes please), but if I'm honest I'd ride a B17 on a longer trip, it's just more comfortable. Soma Bolo seat collar: left over from when I had a Soma. Thomson Elite straight seatpost: honestly, I'm not that attached to it. I'll trade you for a Nitto if you've got one in 27.2 you won't use any more. King Cage bottle cages: simply put, I switched all my bikes over to this model a couple of years ago. The shape is perfect, super tough, great hold and release, and stainless steel. In conclusion: if you like the look of this bike and want something that's tough and rides well, my advice is: Nitto, Honjo, pre-1994 Shimano, and Dia-Compe of any era. You won't go far wrong with Japanese parts, much like with Japanese cameras. Leave a comment under this post or send me an email if you want to talk about this bike! I bring it up all the time anyway.
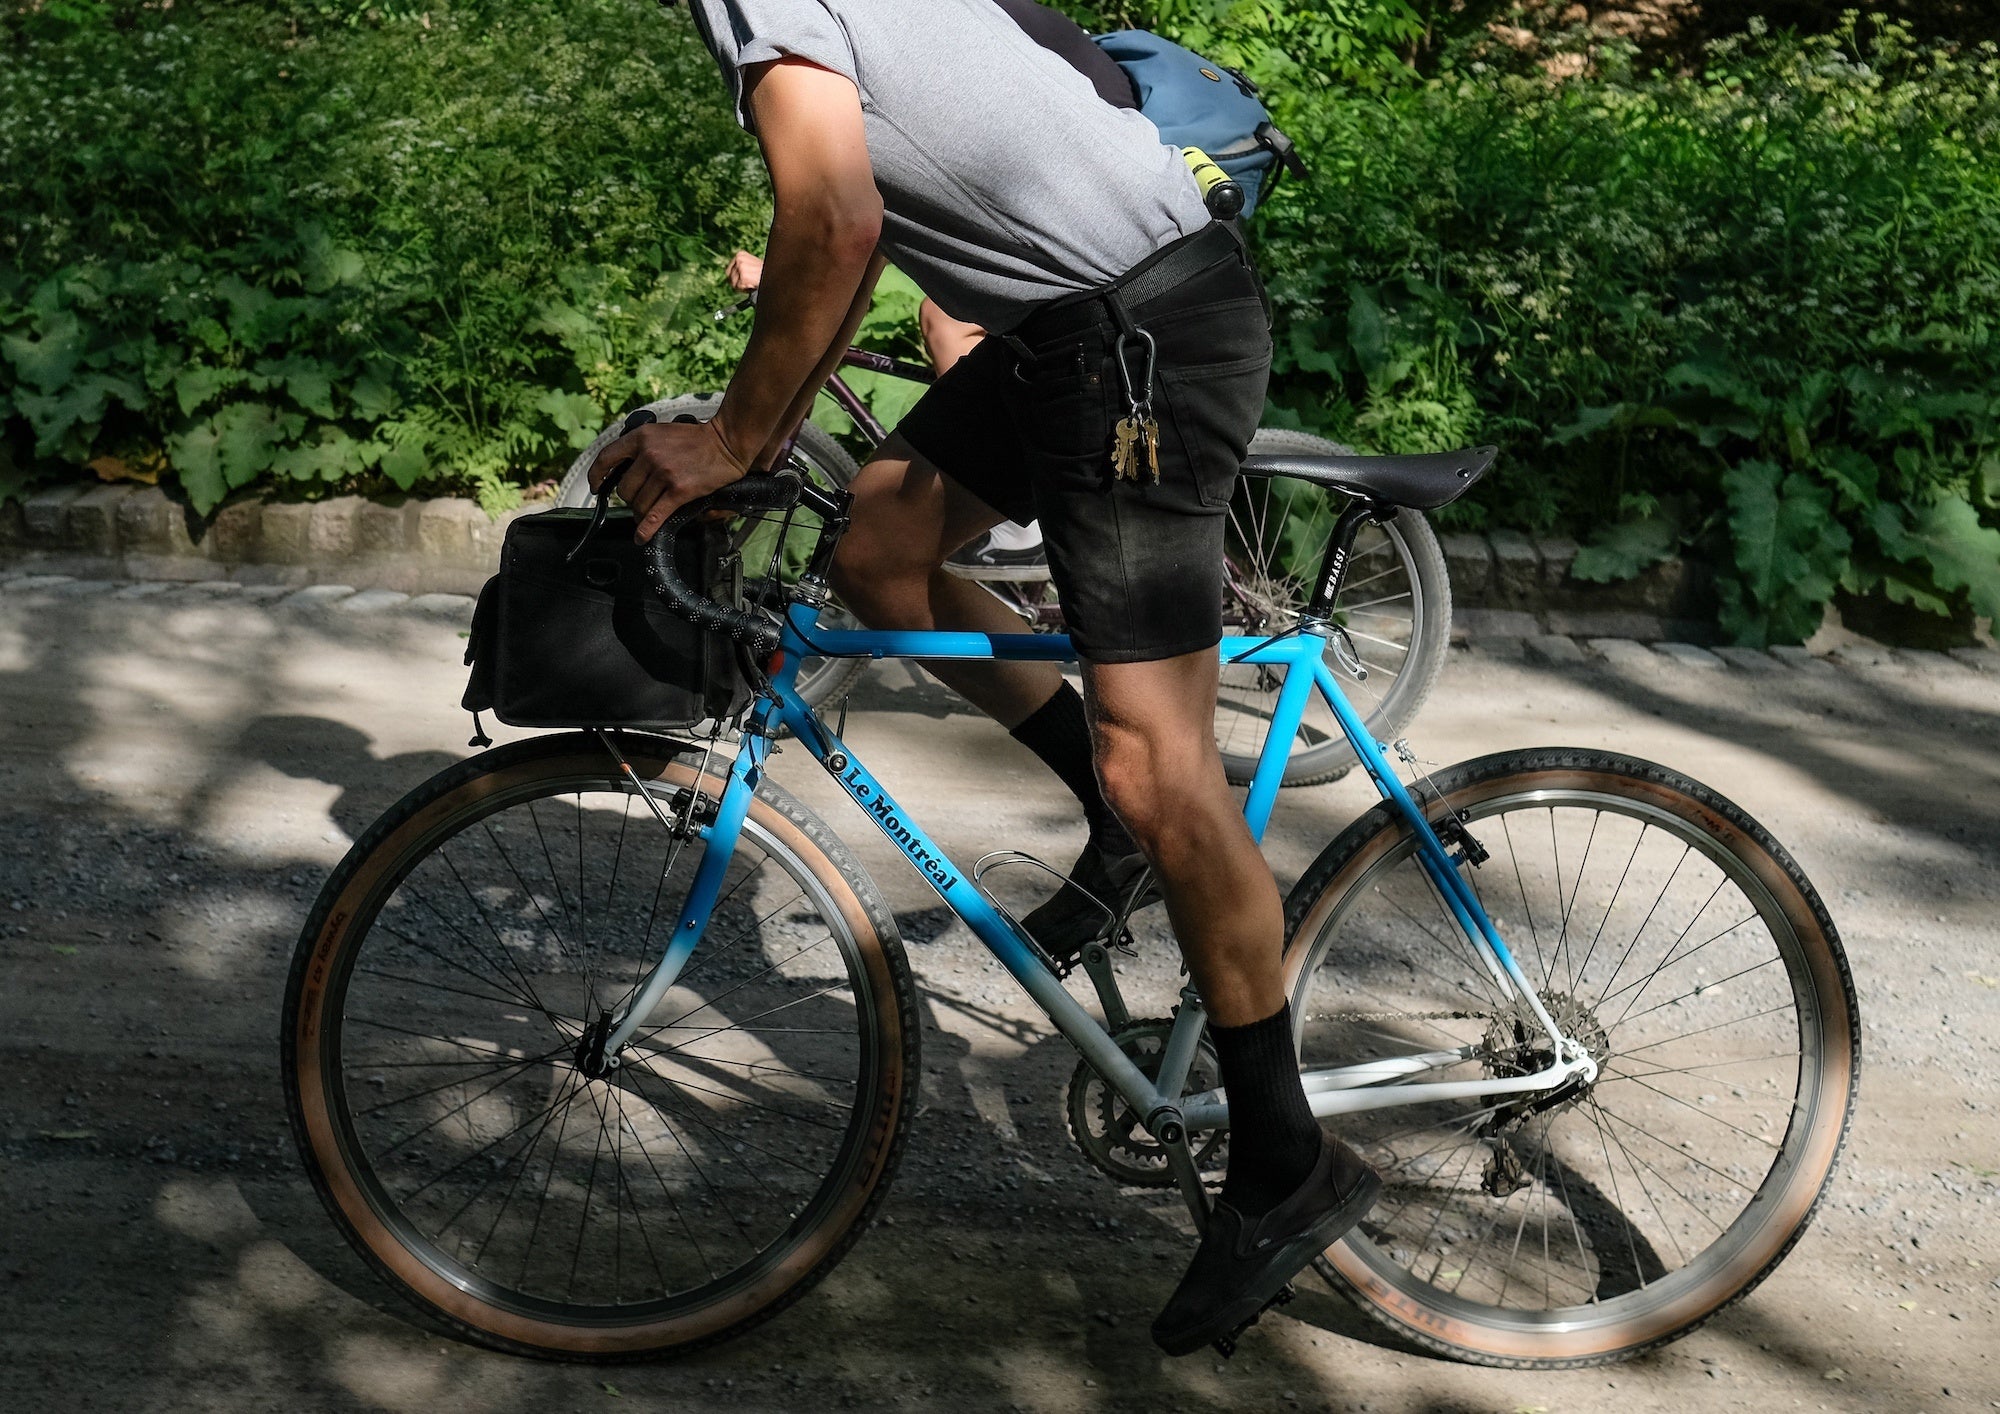
Bobby's Le Montréal Rando
Being already at its 3rd redesign, the Montréal is one of Bassi’s longest-standing models. It was always intended to be a versatile bike for the city and beyond, but this version’s updates make that truer than ever. It’s an incredibly well-rounded bike and looks darn good too! Despite it having a lower stack height than most touring bikes and even some gravel bikes, the quill stem makes its easy to set the handlebar height to each rider’s preference. So you can just as easily slam the stem for a real sporty ride or have it high for comfy cruisin’ without needing a massive stack of spacers. I built mine up with a lot of parts I had lying around just waiting for the right frame to show up, like the Cambio Rino shifters I took off a Le Croco road bike that was gifted to me a few years ago. Bassi Le Montréal frame and fork Tange CDS headset Crust stem by Nitto Sim Works So Bar by Nitto TRP RRL brake levers Brooks Cambium C17 saddle Vintage Cambio Rino downtube shifters Sim Works Bubbly pedals by MKS Sakae CX crank with 45/30 chainrings 11-36 9-speed cassette NOS Shimano XTR M960 rapid-rise rear derailleur WTB Byway 650x47B tires Atwater Atelier rando bag It's a sweet ride that's faster than a touring bike and more capable than a road bike, and you should be one! There are only a handful of these frames left so be sure to reach out by email or visit one of our locations if you’re interested. Photos by @Jochhoo